
Escape the Ordinary: Dive into the Delight of a DIY Terrarium
Tired of the same old houseplant routine? Craving a touch of nature, but short on space or time? Then it's time to embark on a journey into the fascinating world of terrariums! These self-contained miniature ecosystems are not only stunningly beautiful but also remarkably low-maintenance. Imagine a vibrant, thriving garden flourishing inside your home, requiring minimal care and offering endless visual delight. This guide will walk you through every step, from selecting the perfect plants to understanding the delicate balance that keeps your miniature world flourishing. Get ready to create your own captivating DIY terrarium ecosystem!
Step 1: Gathering Your Terrarium Toolkit
Before we get our hands dirty, let's gather the essential tools and materials. Think of this as assembling your artist's palette for a living masterpiece.
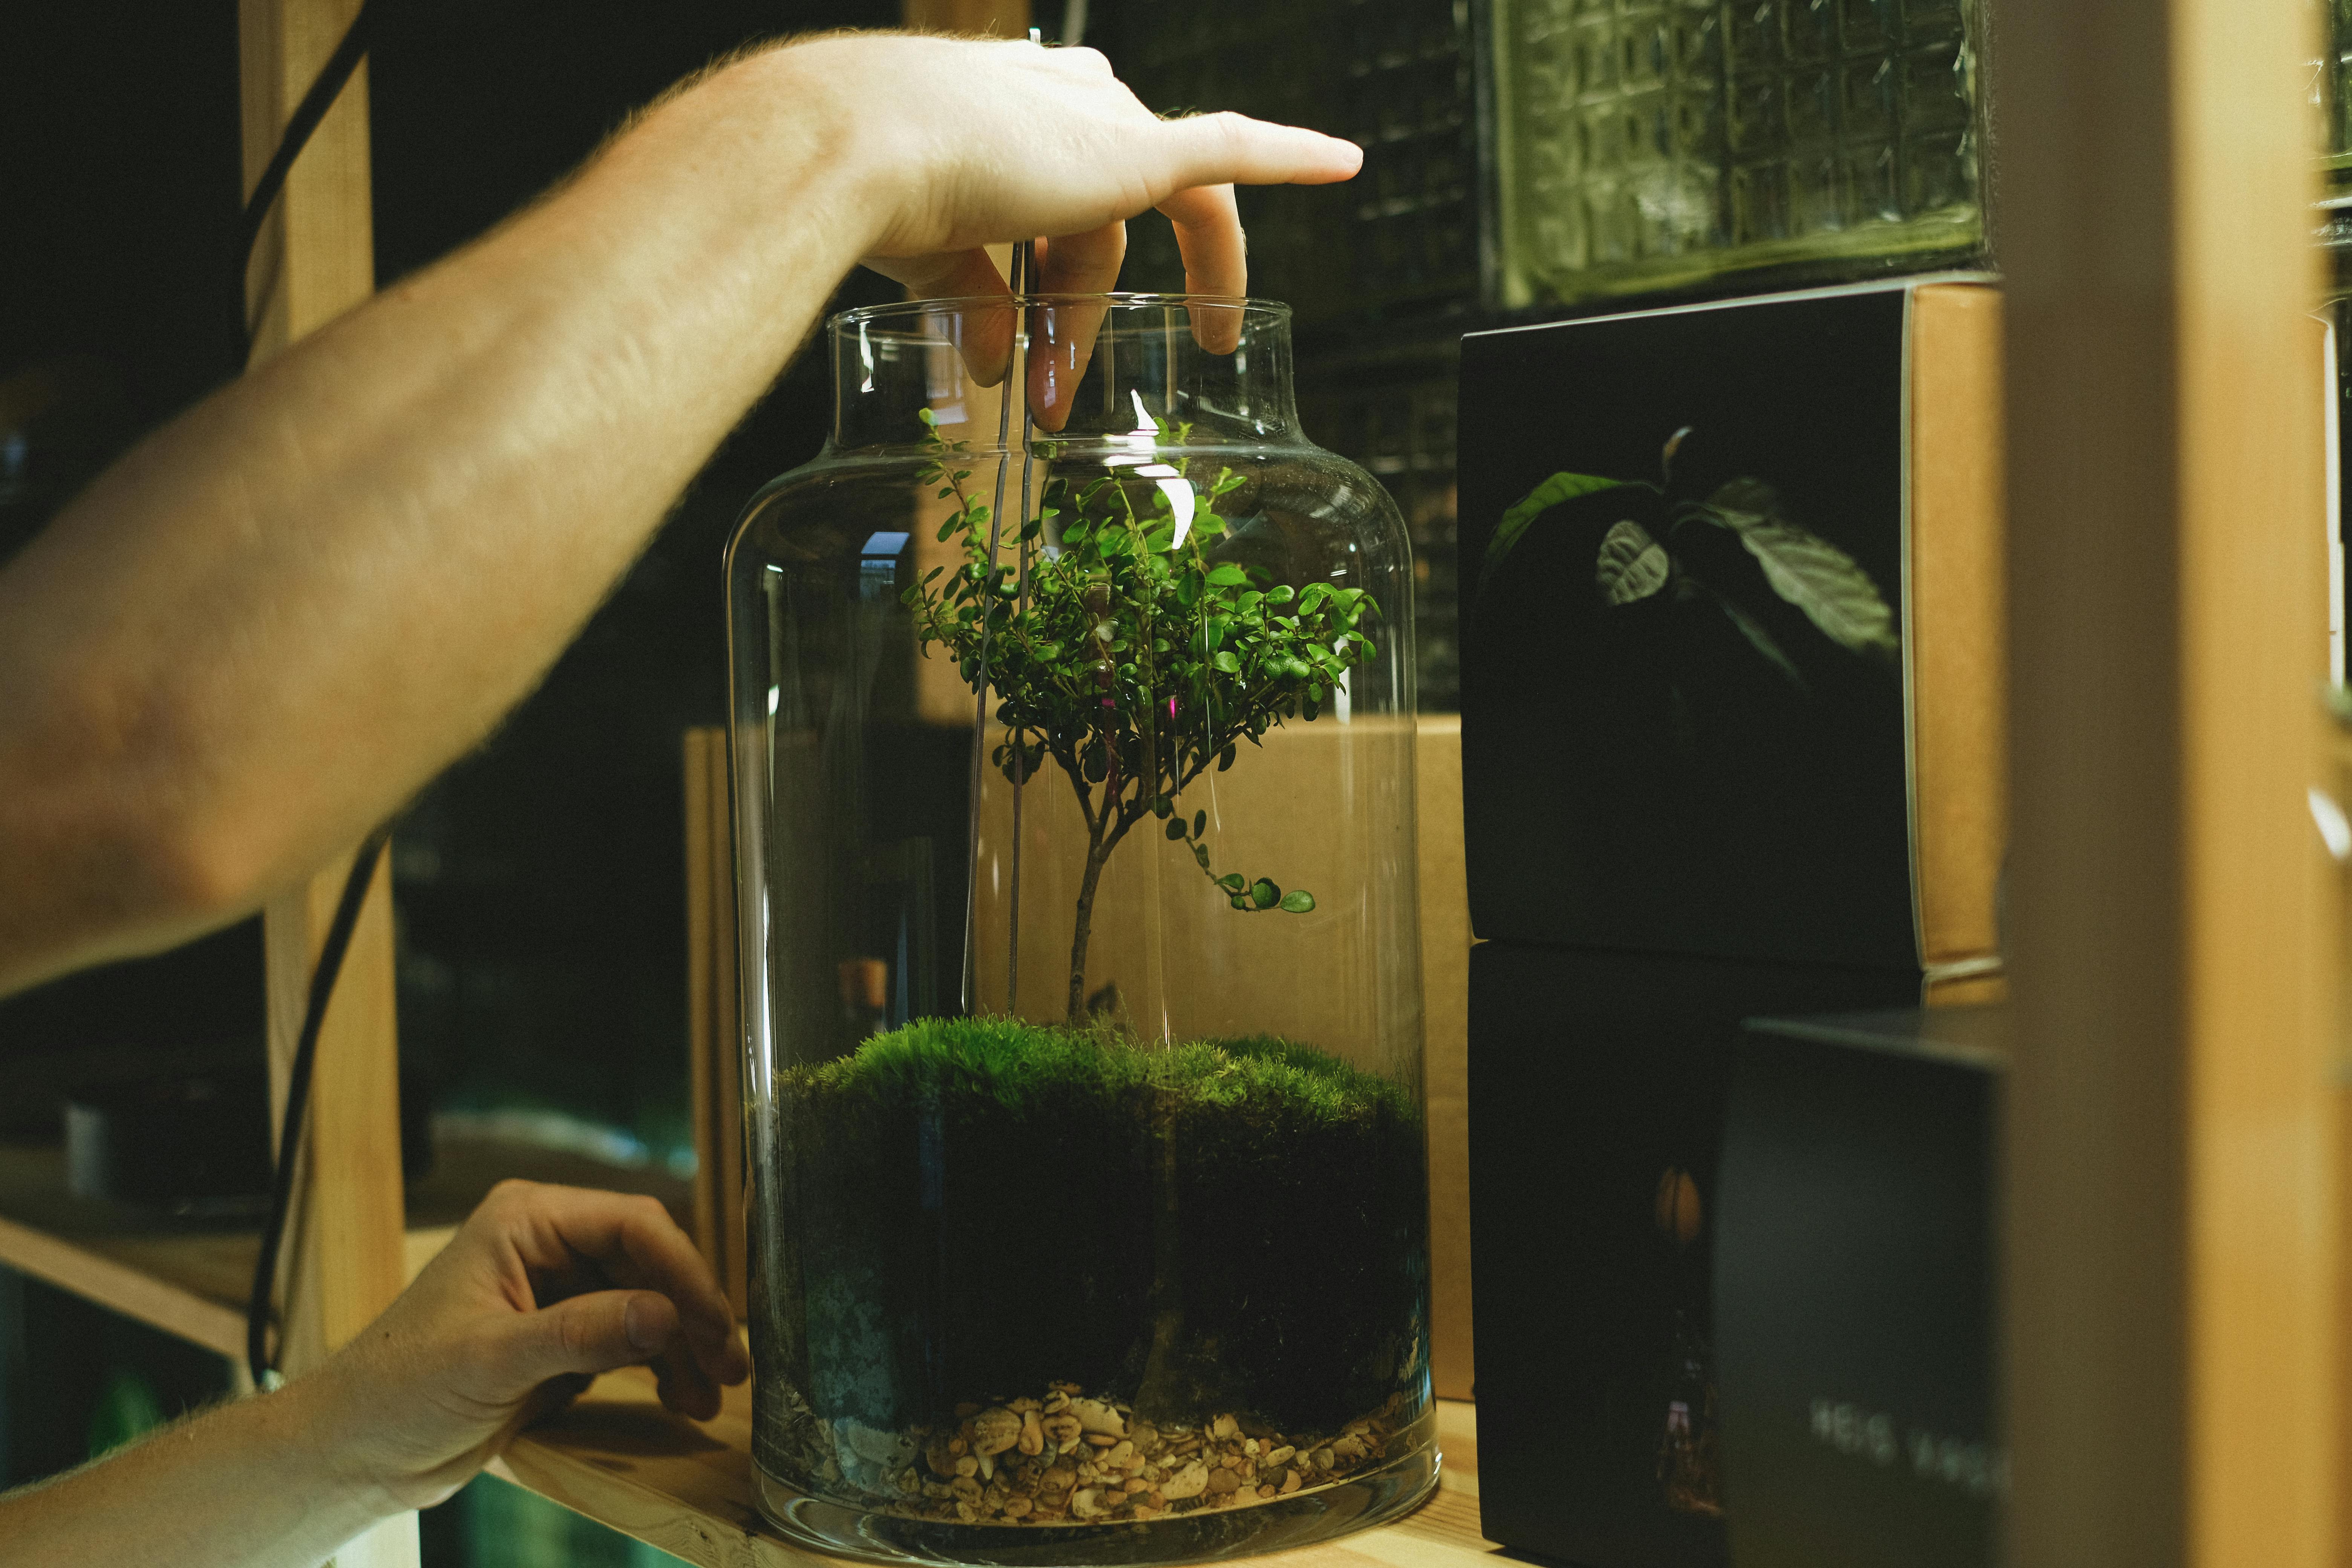
- The Vessel: The heart of your terrarium. Choose a clear glass container. Options range from simple mason jars to elegant glass bowls or even repurposed fish tanks. Consider the size and shape in relation to your space and the plants you plan to use. A wider opening makes planting easier.
- Drainage Layer: This is critical for preventing root rot. Use small pebbles, gravel, or even aquarium gravel.
- Separator Layer: A barrier between the drainage and the soil, preventing the soil from becoming waterlogged. Activated charcoal is the best choice because it also helps filter the water and remove impurities.
- Terrarium Soil: Choose a well-draining potting mix specifically formulated for terrariums. This often includes a blend of peat moss, perlite, and vermiculite. You can also create your own mix, tailoring it to the specific plants you choose.
- Plants: Select plants that thrive in a humid, enclosed environment and have similar light and water requirements. Consider:
- Small Ferns: Such as maidenhair ferns or button ferns, add a lush, green texture.
- Mosses: Provide a soft, carpet-like base and contribute to the ecosystem's humidity.
- Small Tropical Plants: Such as peperomias or nerve plants, offer a variety of leaf shapes and colors.
- Air Plants (Tillandsia): Can be a great addition to a terrarium, but require more airflow and are best used in open terrariums.
- Decorative Elements (Optional): Enhance the aesthetic appeal with decorative stones, small figurines, driftwood, or even colorful sand.
- Tools:
- Long-handled spoon or tongs: For placing layers and plants.
- Spray bottle: For misting the plants.
- Small shovel or trowel: for scooping soil.
- Gloves: To keep your hands clean.
- Scissors or pruning shears: For trimming plants.
Step 2: Constructing Your Miniature World: The Layering Process
Now for the exciting part! The layering process is the foundation of your terrarium's success. Follow these steps carefully:
- Drainage Layer: Add a 1-2 inch layer of pebbles or gravel to the bottom of your container. This provides drainage and prevents water from sitting at the roots of your plants.
- Separator Layer: Add a thin layer (about 1/2 inch) of activated charcoal. This layer filters the water, removes impurities, and helps prevent unpleasant odors.
- Soil Layer: Add a generous layer (2-4 inches, depending on the size of your container and the roots of your plants) of the terrarium potting mix. Gently pat the soil down to create a stable base.
- Planting: Carefully remove your chosen plants from their pots. Gently loosen the roots and remove any excess soil. Use your long-handled tools to plant them in the terrarium, arranging them aesthetically and considering their mature sizes.
- Decorative Touches: Add any decorative elements, such as stones or figurines, to create visual interest and personalize your terrarium.
Step 3: The Art of Terrarium Maintenance: Keeping Your Ecosystem Thriving
Congratulations! You've built your terrarium. Now comes the ongoing care, which is surprisingly simple. The goal is to create a balanced ecosystem, so observe your terrarium regularly and adjust your care accordingly.
- Watering: The frequency of watering depends on the type of plants, the size of the terrarium, and the environment. As a general rule, water sparingly. The soil should be moist, but not waterlogged. A good indicator is condensation on the glass. If you see excessive condensation, open the terrarium for a few hours to allow excess moisture to escape. If there's no condensation at all, it's time to mist lightly.
- Light: Place your terrarium in a location with bright, indirect light. Avoid direct sunlight, which can scorch the plants and overheat the terrarium.
- Pruning: Trim any overgrown plants or remove any dead leaves to maintain a healthy appearance and prevent disease.
- Ventilation: Occasionally, open the terrarium for a few hours to allow for air circulation, especially if you notice excessive condensation or fungal growth.
- Observation: Pay close attention to your terrarium. Observe the plants for any signs of stress, such as yellowing leaves or wilting. Adjust your care as needed.
Step 4: Troubleshooting Common Terrarium Issues
Even with the best care, you might encounter some challenges. Here are solutions to some common terrarium problems:
- Excessive Condensation: This can lead to fungal growth and root rot. Open the terrarium for a few hours to allow excess moisture to evaporate. Reduce watering frequency.
- Lack of Condensation: Indicates the terrarium is too dry. Mist the plants lightly with a spray bottle.
- Yellowing Leaves: Can be a sign of overwatering, underwatering, or insufficient light. Assess the watering habits and the location of your terrarium.
- Fungal Growth: Usually appears as white or gray patches on the soil or plants. Improve air circulation by opening the terrarium. Remove any affected plants or leaves. Consider adding a small amount of cinnamon to the soil, as it has antifungal properties.
- Pests: Inspect your plants regularly for pests, such as aphids or spider mites. If you find any, isolate the affected plant and treat it with an appropriate insecticidal soap or horticultural oil.
Real-World Example: A Case Study
Let's consider a case study. Sarah built a closed terrarium using a large glass jar. She chose a variety of small ferns, mosses, and a peperomia. She meticulously followed the layering process and placed her terrarium in a location with bright, indirect light. Initially, she watered the terrarium frequently, and noticed excessive condensation. She adjusted her watering schedule, opening the terrarium for a few hours each week, and the ecosystem quickly stabilized. Her terrarium is now a lush and vibrant centerpiece in her living room, bringing her daily joy and a connection to nature.
Conclusion: Embrace the Miniature World
Creating a DIY terrarium is a rewarding experience. It's a chance to connect with nature, express your creativity, and bring a touch of green into your home. By following these steps and paying attention to the needs of your miniature ecosystem, you can enjoy a beautiful and low-maintenance garden for years to come. So, gather your materials, unleash your inner artist, and build your own thriving miniature world. The beauty and tranquility of your self-sustaining terrarium await!
This post was published as part of my automated content series.

Comments